Most developers are probably already familiar with the JavaScript Package Manager NPM (Node Package Manager), as it is widely used. This concept inspired the creation of a package manager for PHP, known as Packagist, which is utilized with Composer. The unique advantage? You can install Composer globally and integrate it directly into NetBeans, allowing you to manage it through dedicated interfaces, a perfect combination referred to as "NetBeans Composer."
In this post, you'll learn how to implement this integration. I'll guide you step by step on how to do it in the easiest and fastest way possible. You can create scaffolding with PHP, just like with JavaScript, but there are also ways to use the console. I'll delve into that topic another time, so let's begin with the tutorial.
Creating a PHP Project in NetBeans
Setting up a PHP project in NetBeans is a straightforward process. By integrating the power of PHP with NetBeans, developers can streamline their workflow. Follow these steps to get started:
- Click on the "File" tab at the top and select "New Project."
- A window will open. In the category, choose PHP, and on the right under Projects, select "PHP Application" if you want to start a new project without existing files. For a project with existing files, choose "PHP Application with Existing Source."
- Click "Next" and enter the project name and desired PHP version for the help display.
- Click "Next" again, and leave the PHP Built-in Web Server enabled.
- Click "Finish" if you do not want to use a framework.

Once you have completed these steps, you should be able to launch your PHP project. The Index.php file should have been created in the specified folder. To start the project, select a browser at the top (e.g., Chrome) and click on the Play symbol to start the server. Congratulations, you've successfully set up a PHP project in NetBeans and are ready to begin development!

Installing PHP Composer in NetBeans
The installation of PHP Composer in NetBeans is a critical step in simplifying package management for PHP projects. Composer integrates seamlessly with NetBeans to allow for more efficient handling of dependencies and libraries. Here's how you can install it:
- Download the composer.phar file and save it in a folder outside of your projects. This will make Composer globally available, and you can use it in any project without having to download the file each time.
- Don't forget to update the file when a newer version is available. The current version is 2.5.8.
- Although you can download Composer manually, programmatic installation is recommended. For this, you can create a Docker container with Docker and load Composer directly into your project. However, you will not be able to use the Composer interface in NetBeans from outside the container; for that, you'll need Composer outside the container.
COPY --from=composer:latest /usr/bin/composer /usr/bin/composer
By integrating Composer into NetBeans, you gain a powerful tool for managing your PHP dependencies. It simplifies working with libraries and packages and contributes to the smooth functioning of your projects. Composer's collaboration with NetBeans enhances the development process, making it more streamlined and effective.
Integrating Composer with NetBeans

Once you've placed the composer.phar file outside of your projects, it's time to integrate it with NetBeans. Here's how to do it:
- Open NetBeans.
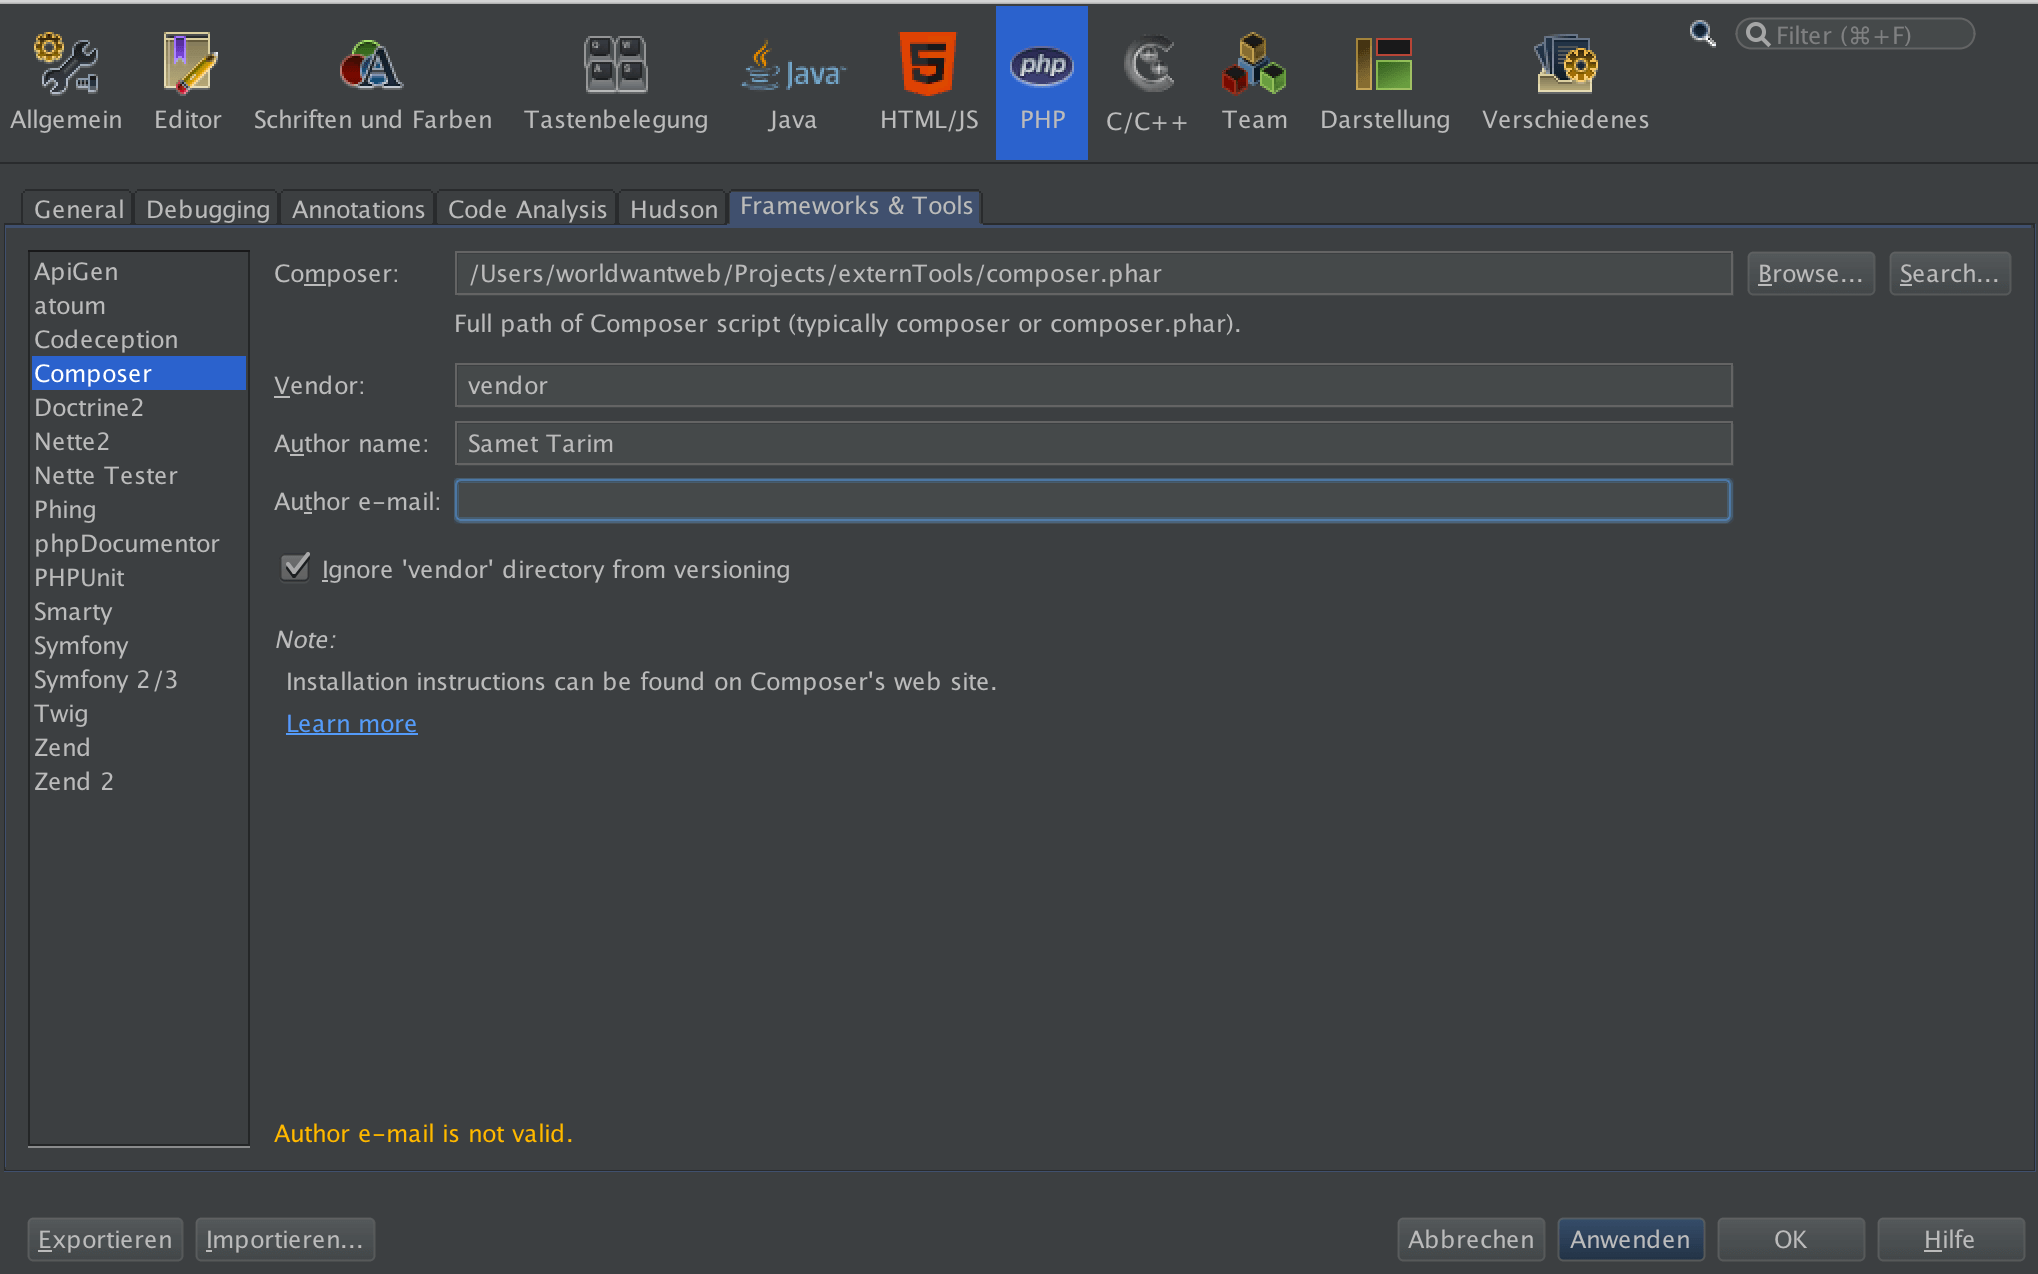
- Navigate to Settings (Preferences) -> PHP -> Frameworks & Tools -> Composer.
- Enter the path to your composer.phar along with other details such as the vendor folder, author, author's email, and the versioning option.
- Confirm these settings.
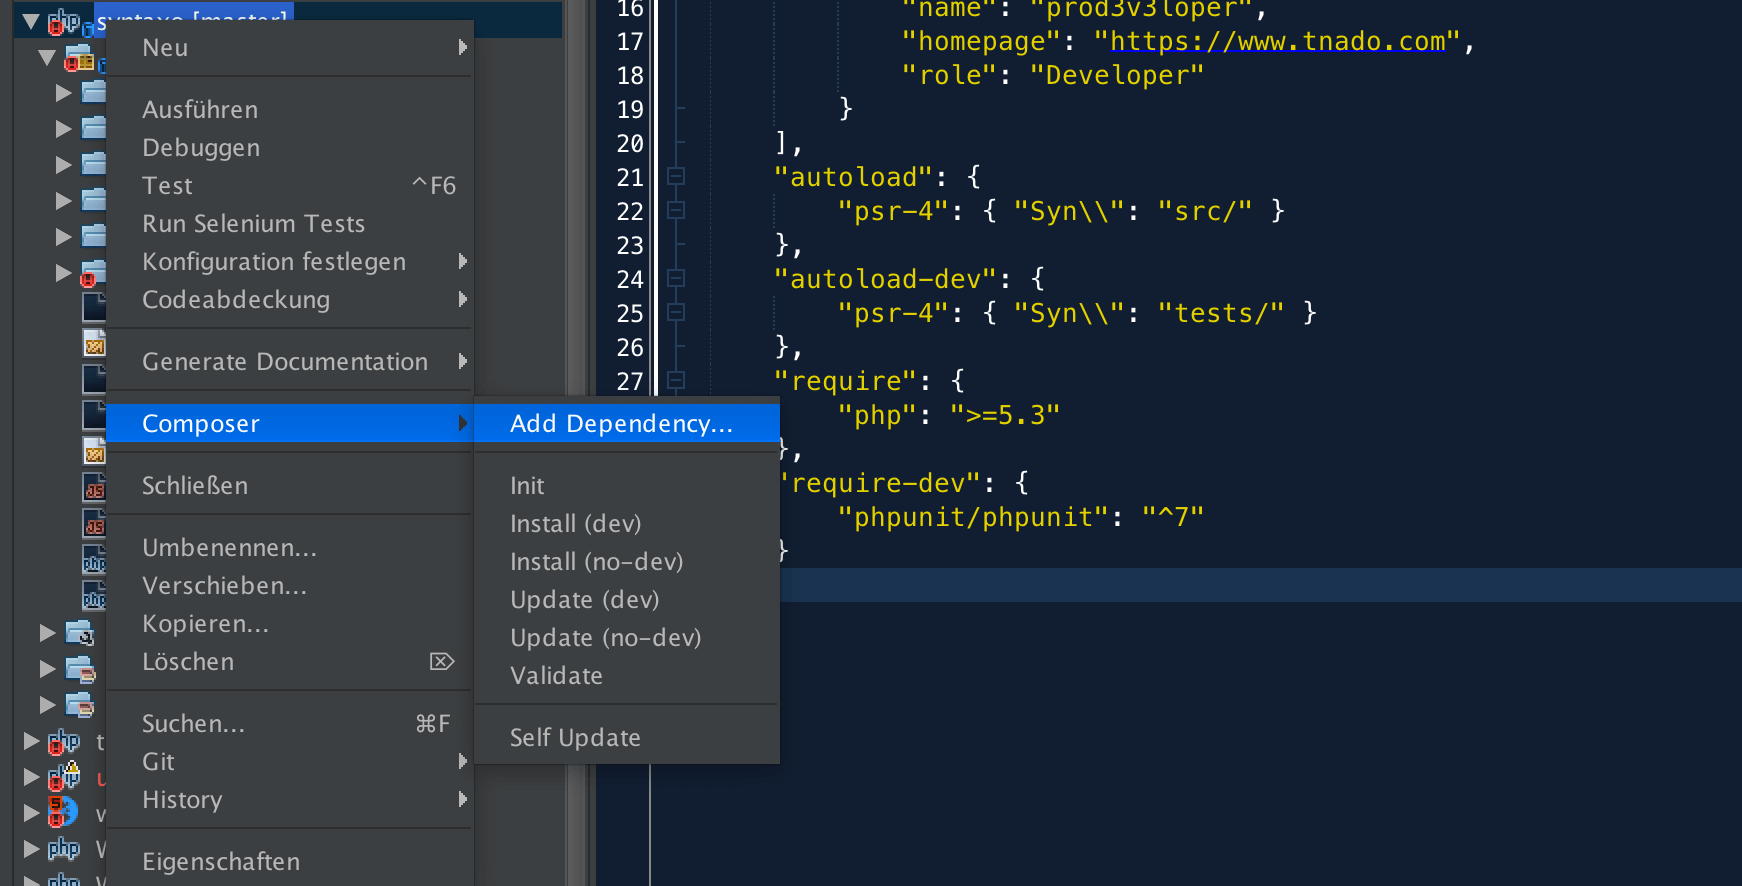
With these steps completed, you can now use Composer through the dedicated interfaces in NetBeans, making your development process smoother and more efficient.
Installing Repositories with Composer

To specify and download the repositories you want to use, you'll need a composer.json file. You can find the required repositories on Packagist and specify them in your composer.json file. A typical configuration might look like this:
0 { 1 "name": "my-project", 2 "autoload": { 3 "psr-4": { "Syn\": "src/" } 4 }, 5 "autoload-dev": { 6 "psr-4": { "Syn\": "tests/" } 7 }, 8 "require": { 9 "php": ">=7.0", 10 "prod3v3loper/syntaxo": ">=1.0" 11 }, 12 "require-dev": { 13 "phpunit/phpunit": "^7" 14 } 15 } Additionally, you have the option to use the console (terminal) to install the packages, providing further flexibility in managing your project dependencies.
php composer.phar installcomposer installConclusion
Integrating Composer with NetBeans is a powerful combination that simplifies dependency management for PHP developers. By following this tutorial, you've learned how to install and configure Composer, connect it with NetBeans, and manage repositories efficiently. Whether you're working on a new project or enhancing an existing one, these tools offer a streamlined approach to building and maintaining robust PHP applications.
Happy coding!
Advertising